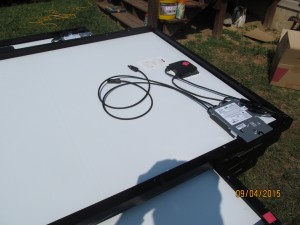
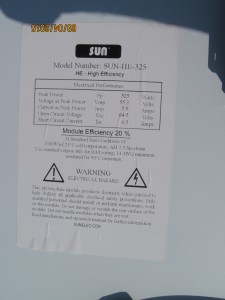
SunPower panels are made by a vertically integrated company in California using proprietary cell technology their founder developed. Their cells are small, but very efficient, with NO shiny silver conductors blocking the face. These cells are found on most Military, aerospace, and high-end jobs! Imagine my surprise when my favorite panel reseller announced they had some for sale. Normally, these panels go for about $1.50/watt, and can only be purchased directly from SunPower. The panels we got were obviously “2nds”, but the reason why was because their leads were shorter than standard! This project used a SolarEdge inverter, that has MAXIMIZERS mounted at each panel, so the slightly shorter lengths had ZERO consequence on this project, and the homeowner got a tremendous system at a DEEP discount. The reseller put his own label on the panels (which promptly fell off at the first dew!), but from the photo you can see the specs, and they are impressive. What’s even more impressive is that the panel SIZE is 41 X 60 inches – SMALLER than standard 60 cell panels on the market!.
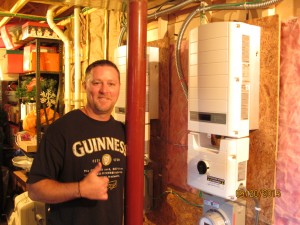
The job came to a total installed power of 14,300 watts, so I recommended that we use a PAIR of SE 7600 inverters. PUCO rules for Ohio say anything over 6000 watts must have a utility grade meter, but for this job we needed TWO meters. The client had TWO 200A service panels, and in order to be in compliance with the NEC (National Electric Code), we could not backfeed both inverters into one panel due to the current limitation for backfeeding. (1.2 X buss rating minus the main breaker) so it would be (1.2 X200)-200 =40A. So we ran each inverter through a meter, to a disconnect switch mounted on the outside of the house (required by the local Fire Department) and then to each inverter. It was a little extra work, but it passed all inspections with flying colors. Both inverters were mounted side by side in the basement, and the 4 strings were run down 2 rigid metal conduits from the roof all the way to the inverters. When running high voltage DC lines inside a residence they MUST be in RMC. That way, if there is ever a short, it will go to the metal conduit and cause a breaker to pop rather than get hot and start a fire! Here’s a picture of the inverter pairs and the happy homeowner!
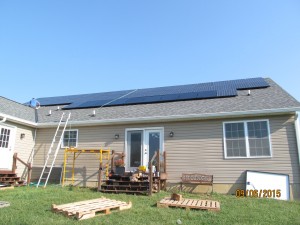
Standard Everest rails and hardware were used to mount the panels to the roof. 8 of the panels were darker than the others, so we put them centered in the bottom row, between some plumbing vent stacks. There’s not a tree anywhere near the home and the roof faces due south, so it makes a LOT of power!! The owner provided a crew of 4 and the whole job took just a hair more than 2 days of time. They prehung and wired the inverters in the basement, so all that was required was the panel hardware and mounting, and running the HV solar wire down the RMC to the inverters in the basement! This setup makes about 1,500 KWH per month (average) which in our area adds up to about $150 in power savings!


What a nice clean install…..can you get Sunpower panels on a regular basis?
getting B grade sunpower panels is like getting to meet the Pope. Only a few folks get them, and they are sworn to secrecy. Sunpower makes the best panels out there (as far as I am concerned) and even their rejects are top of the line!!
Sorry to take so long to reply… but in the last 6 months, SEVERAL panel resellers have had them up for sale – at prices between .80 and 1.00/watt. Sunpower has restructured their business model, and newer panels are coming out soon, so the current models are being sold off…