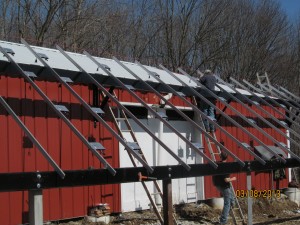
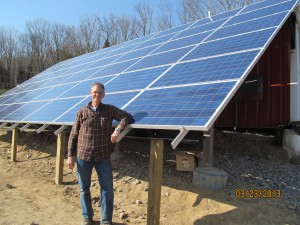
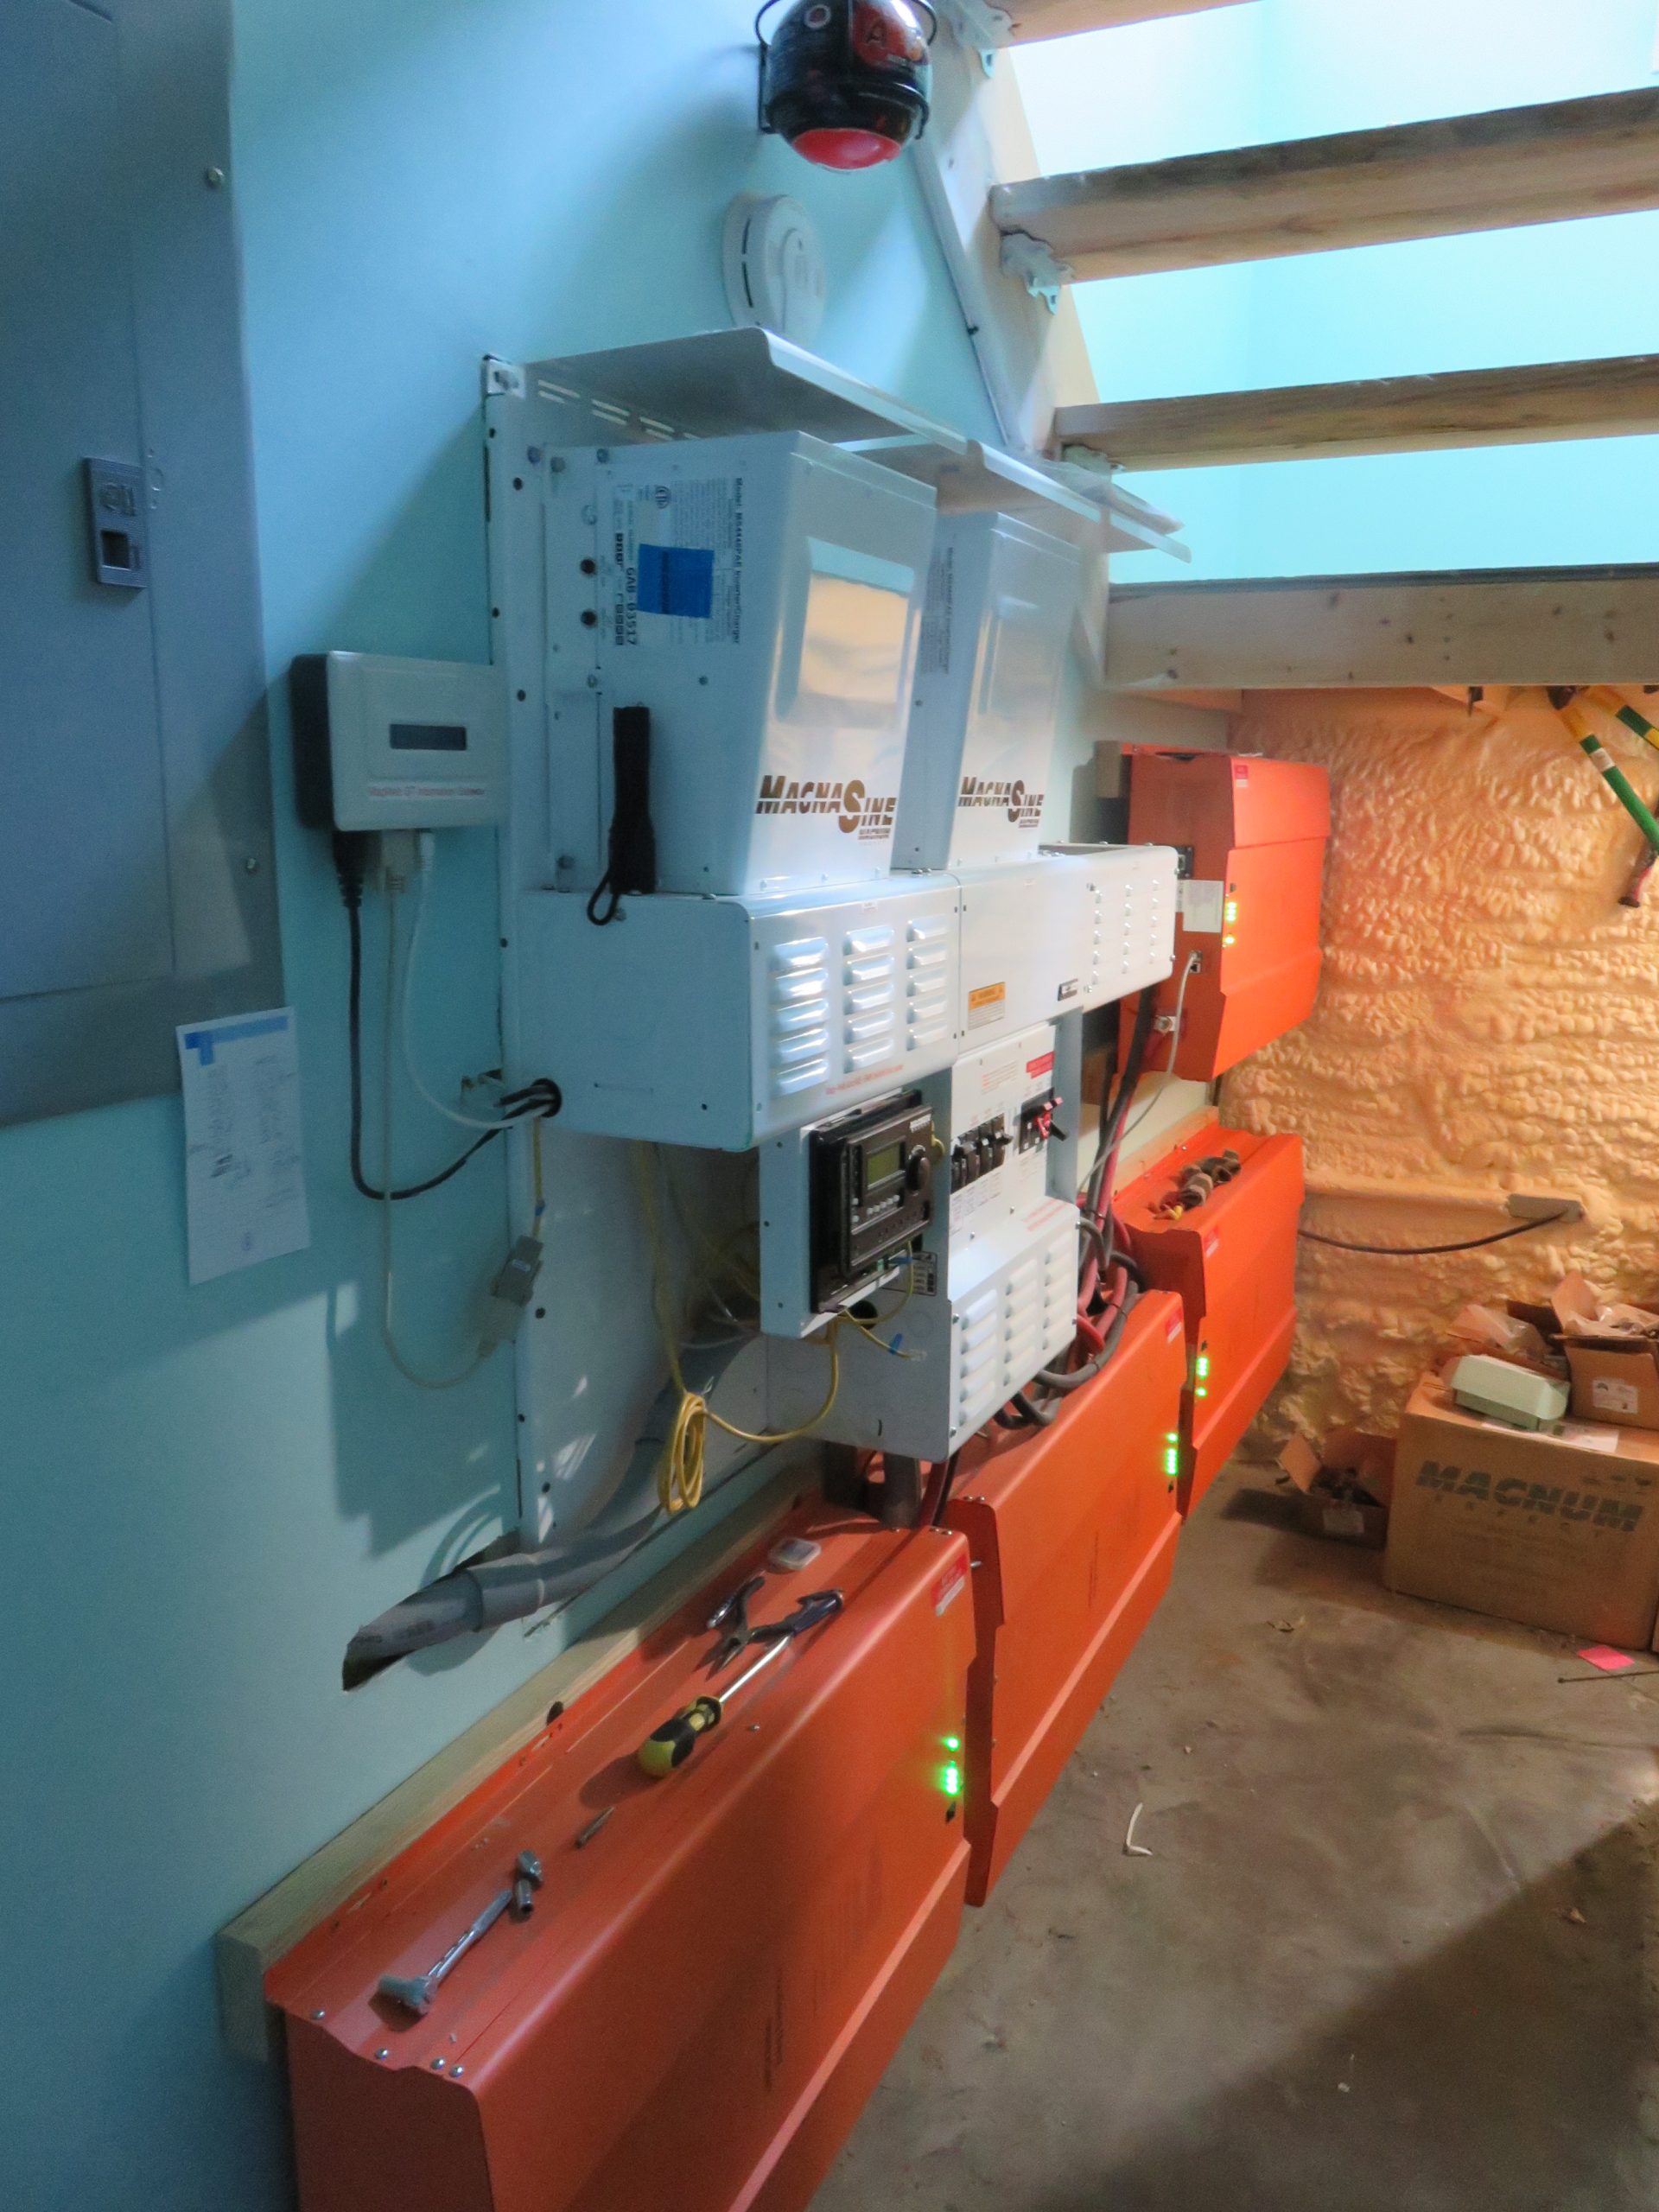
 It’s been a while since I’ve posted. I’ve still been doing DIY consulting, but all my spare time has been going in to the new house. Yup, it’s OFF-GRID, even though power is available. I’ve always wanted to do this, and this was my last chance to do so. If it flops, I can always connect to the street and have a great backup system! Grey box is a “future use” primary input breaker box that goes through the wall to a meter, and down into conduit that goes under the driveway to the hillside. Wires are already installed, so if someone in the future wants street power, they can have the power company excavate from the hillside without tearing up the parking pad. From there, conduit feeds into the main switching area on the triple Magnum inverter (which only has 2 MSPAE4448 inverters mounted at the present time for 9KW of power), and then on to the MAIN breaker panel at the far left.
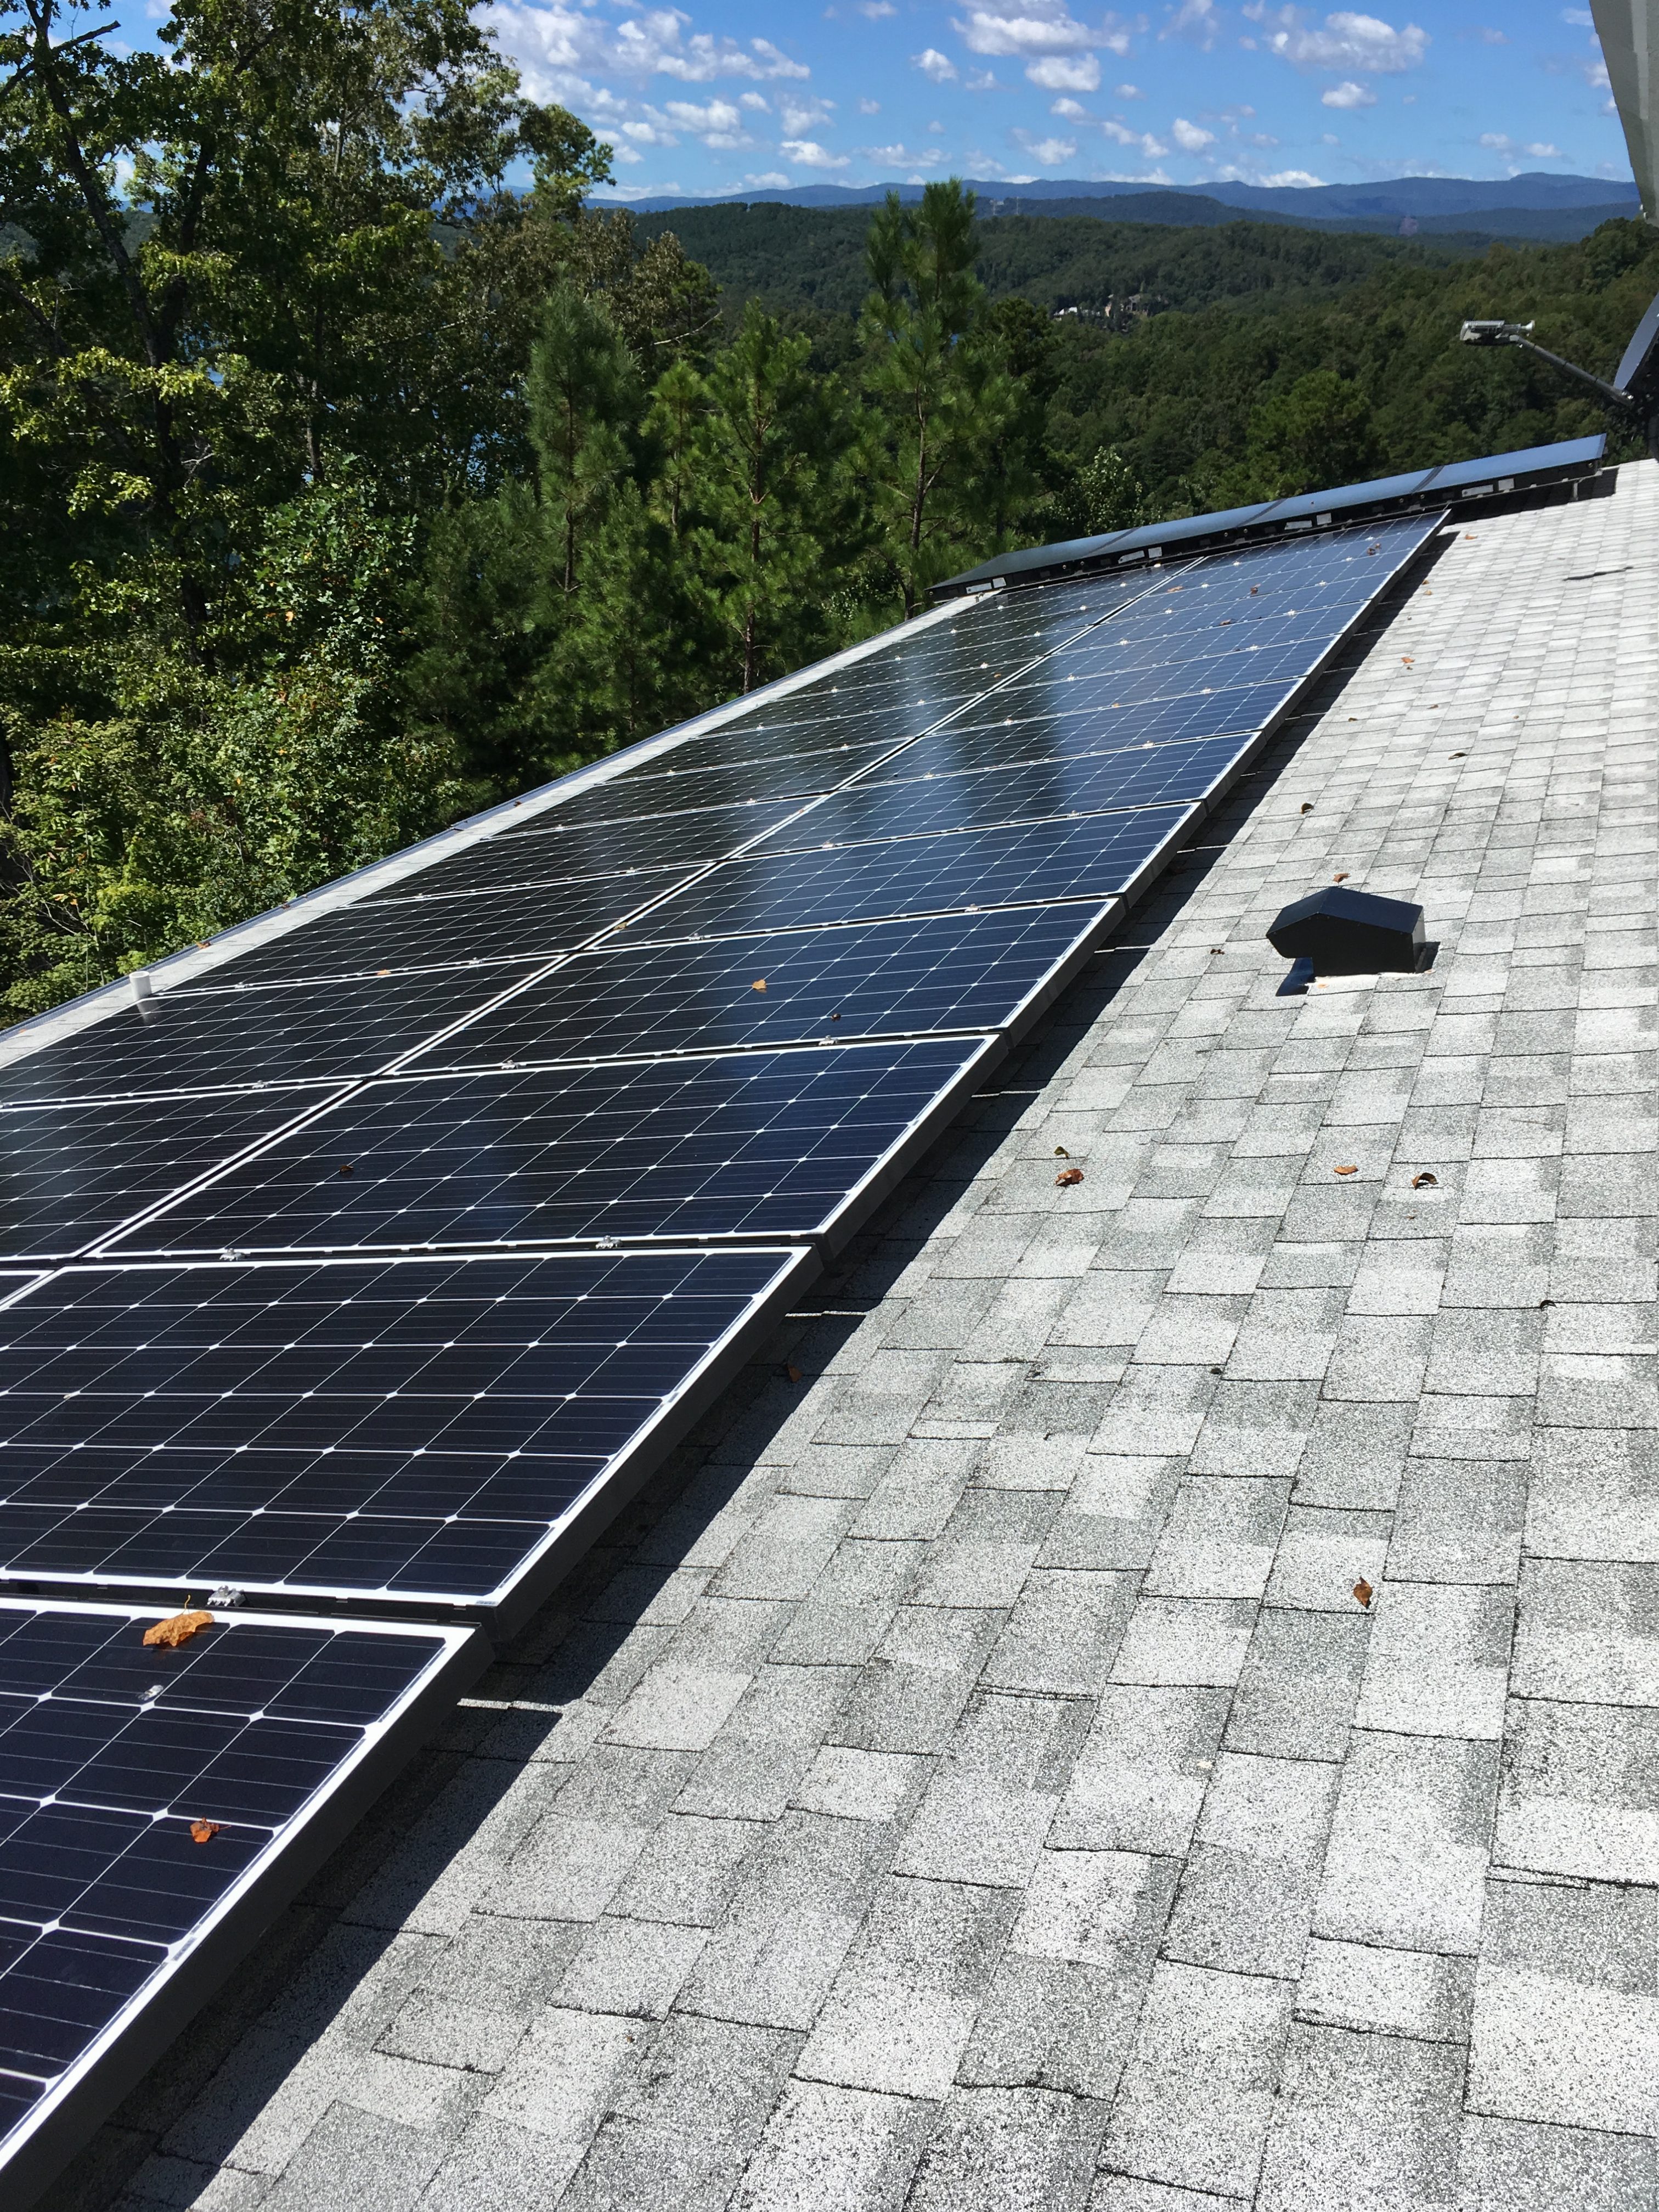
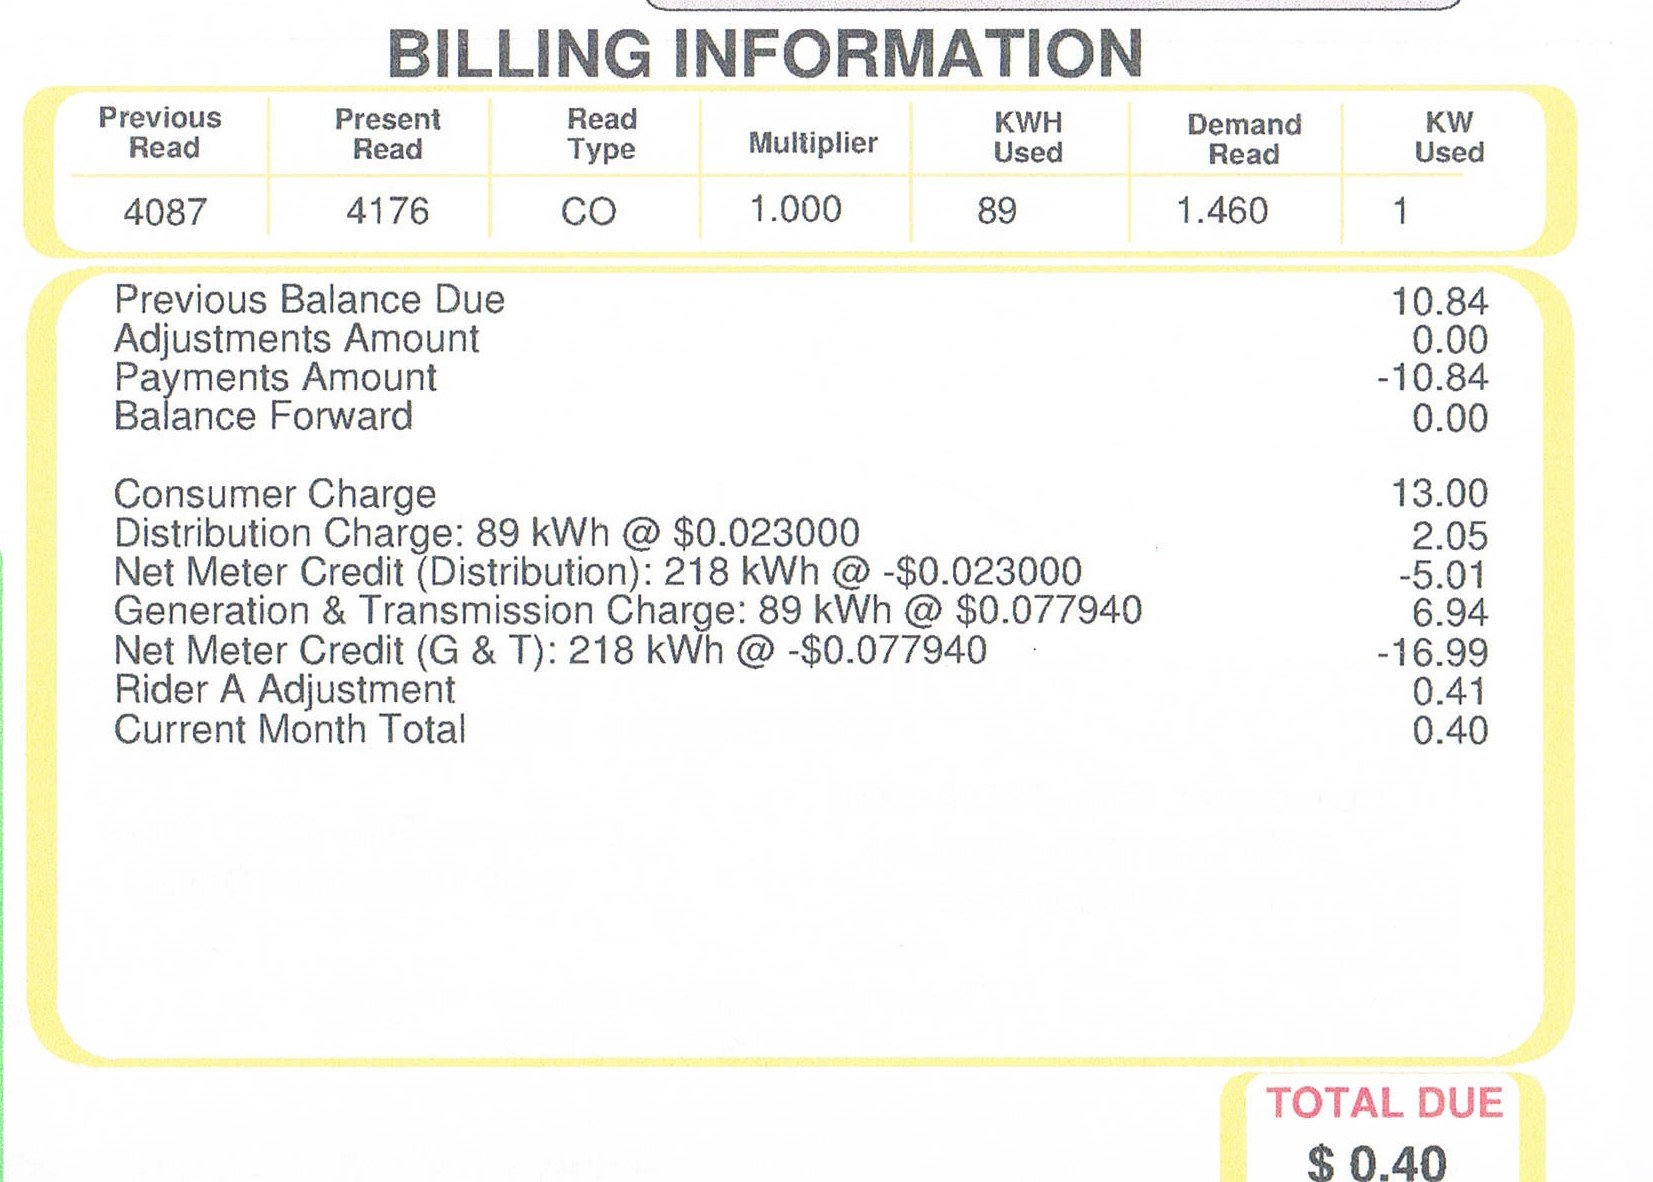
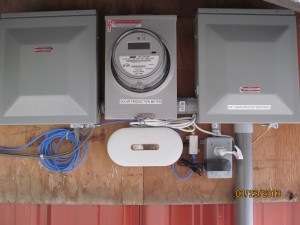
Moving to the roof, I’ve got 28 280 watt panels for 7840 watts in an ideal world. There are 14 Magnum GT500 dual micro-inverters up here that directly convert the DC voltage into 240 volts AC. There are two strings of 14 panels, and each string goes back to a 2 pole 20A breaker in the main panel. This provides both an AC back-feed into the battery inverter to charge the batteries AND at the same time provides any excess power from the sun DIRECTLY to the appliances. So on sunny days, we can do the laundry, running the washer and dryer at the same time without discharging the battery bank at all! This is dramatically different than a traditional off-grid setup with panels, charge controller, batterybank and battery inverter. The traditional setup means the power is limited by the size of the inverter. If my batteries are fully charged, I can draw 8.8KW (2 X 4.4kw) plus the 6KW from the panels for a total of almost 15KW around noon on a sunny day! I’ve trashed my big AGM batteries for the FOUR 10KW LiFePo4 batteries (orange boxes) and all connections to the Magnum interface are equal length 4/0 copper. Thus, a PERFECT matchup in terms of charging power. This also gives a daily (overnight) discharge of about 20%, which babies the battery bank and will allow for a full 6000 cycle (plus more!!) lifespan. The bank is fully charged (in normal sunlight) by 1PM each day. The panels are PERC type, and also do well on grey days, producing about 2800 watts reaching full charge before sundown even in winter. If we have too many dark days, I have a 9KW Generac that is wired to the AC input on the Magnum system. Last year it ran only once for a couple hours. No point in wasting generator fuel – just recharge batteries enough to make it through the night – sun might shine tomorrow!
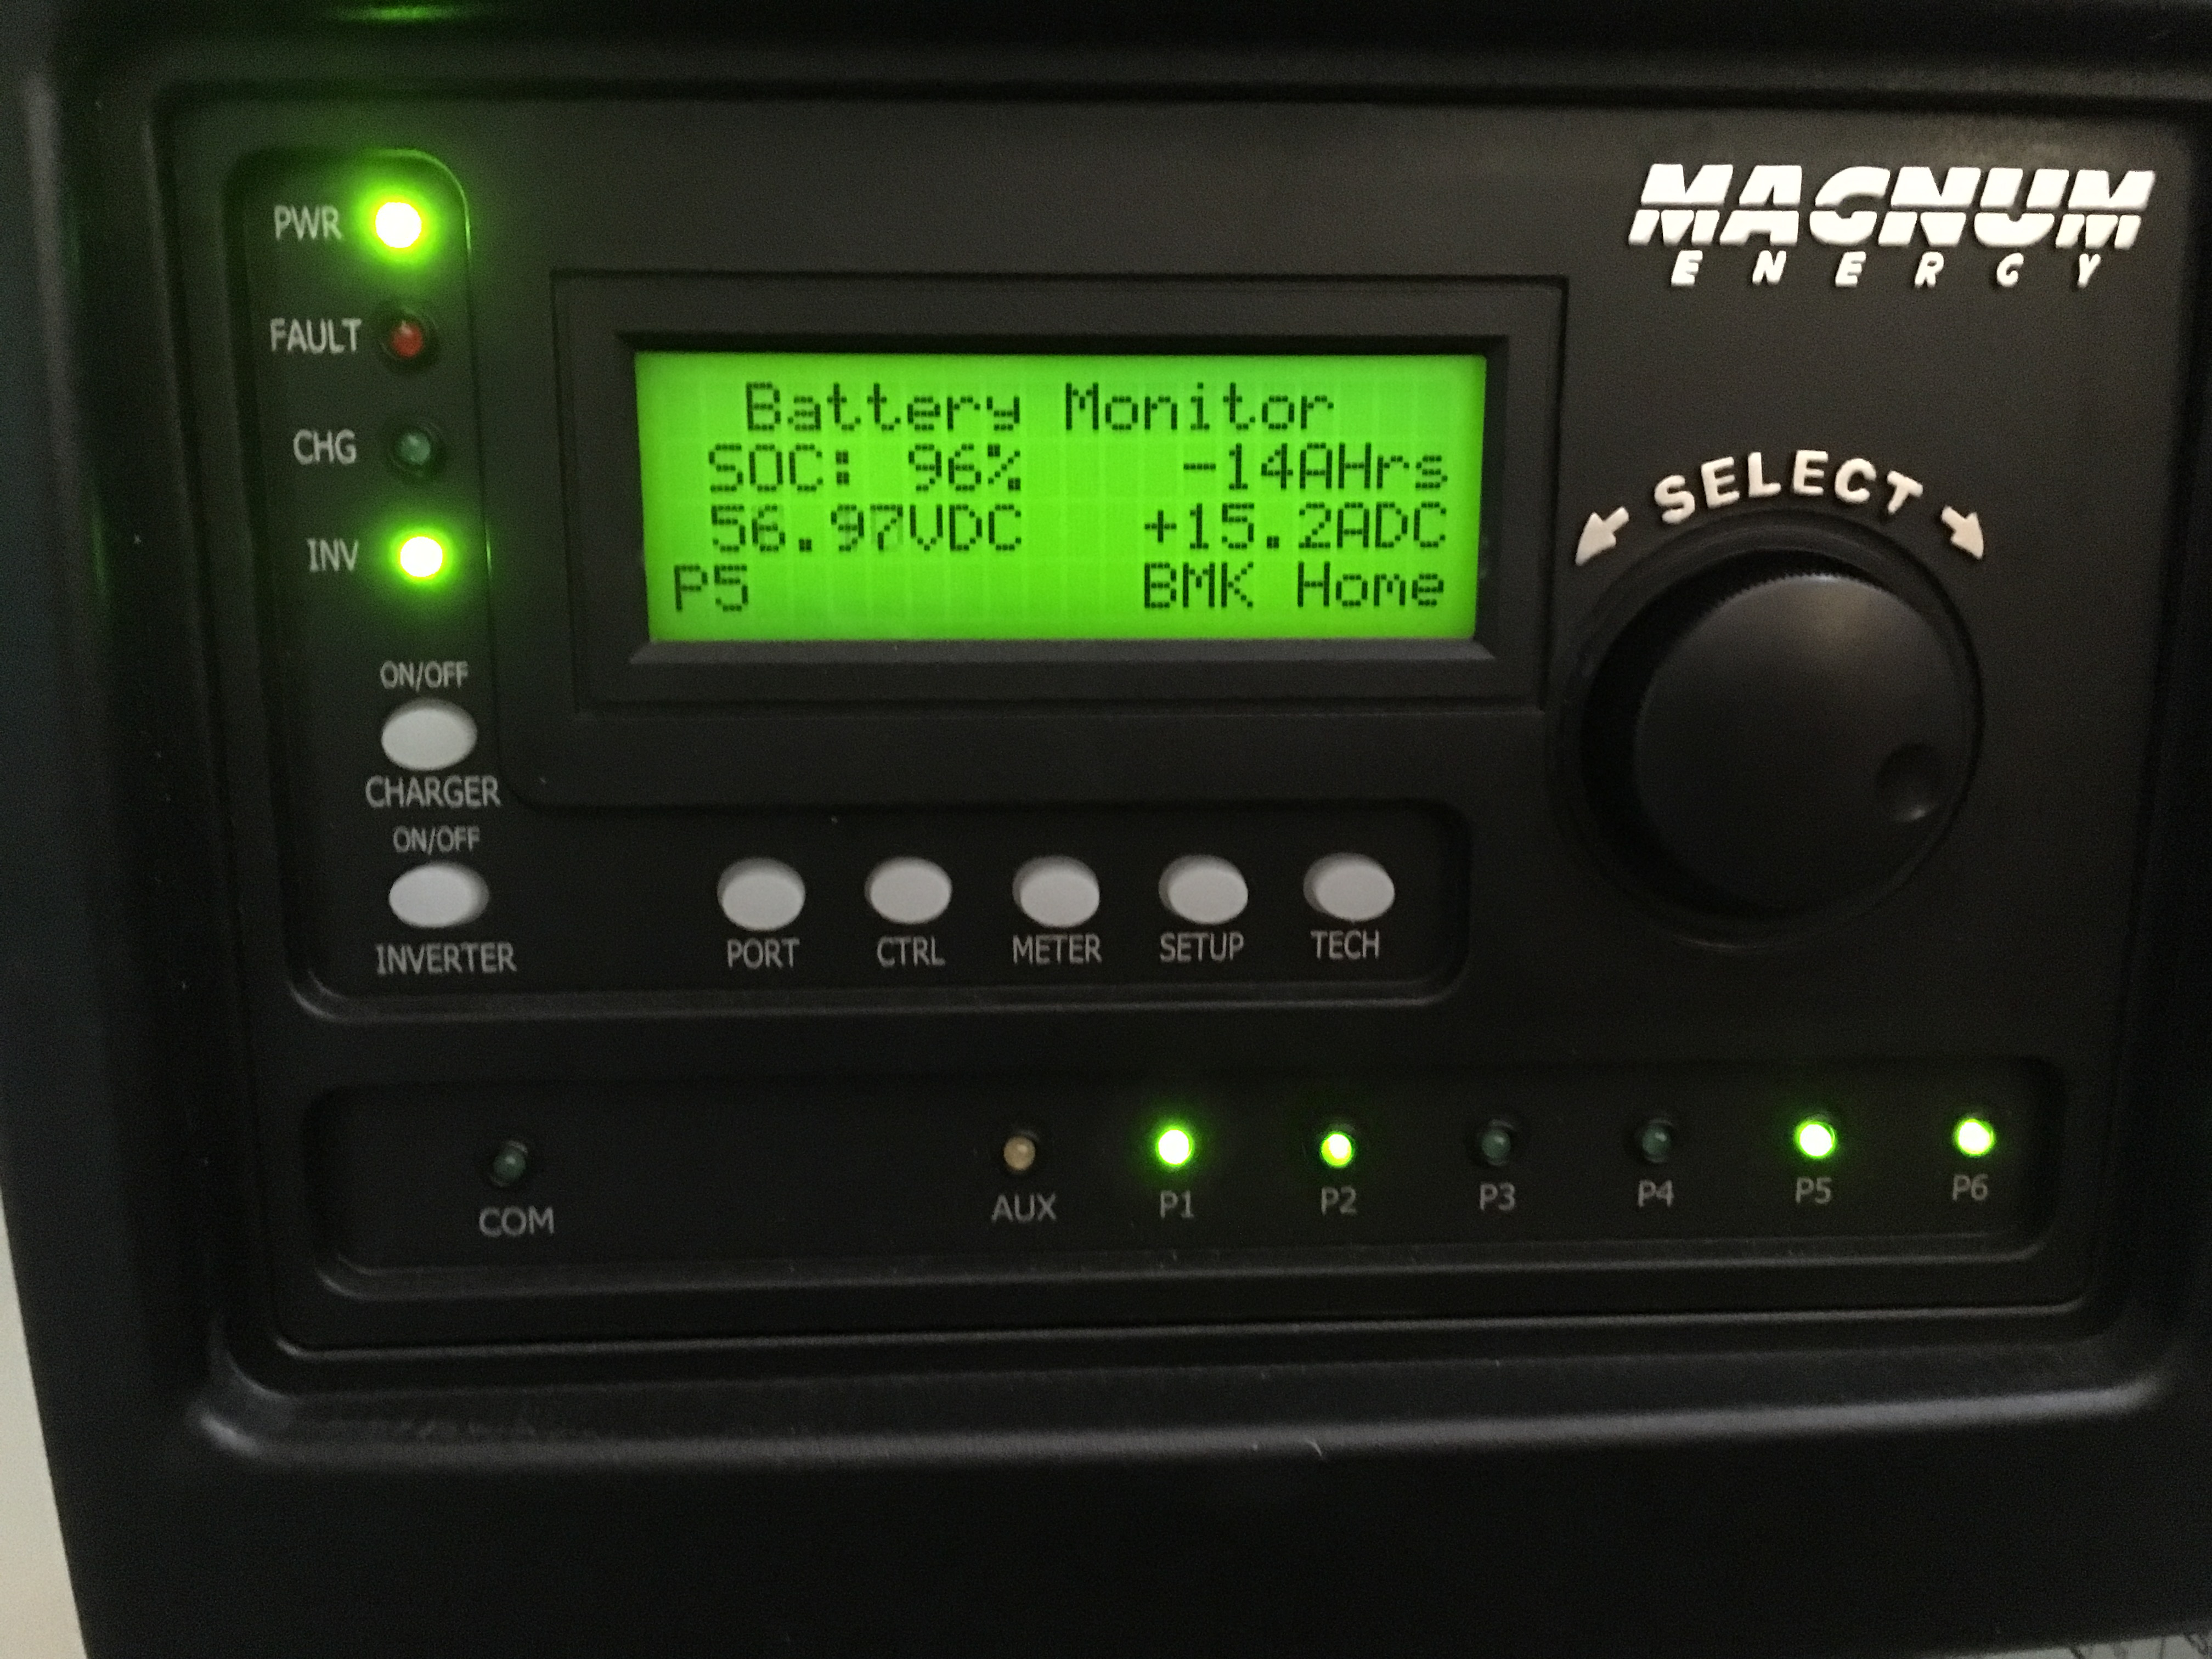 The Magnum ME-RTR Router does a nice job of controlling all three of the MSPAE-4448 battery inverters, and allows fine tuning the BULK, ABSORB and FLOAT voltages to suit whatever battery type you have. This is CRITICAL if you want to maximize the battery life by applying the proper charge regime that the manufacturer recommends. The information display is very informative. I’ve also got a regular display that mounts upstairs where it’s more convenient to keep an eye on the system. It’s also connected to the local network for viewing on my home computer. Shows the same data, but in the form of a pretty graphic! A Magnum MAGWEB is also connected to put the data onto my local network. IMPORTANT NOTE: if running AC coupled OFF GRID, the ONLY PARAMETER THAT WILL TERMINATE BATTERY CHARGE WHEN FULL IS THE “ABSORB” setting. None of the other ARTR settings matter!! it should be set to about 4 volts LESS than the fully charged battery will be!!! If you fail to follow this, you will overcharge your batteries! This will cause OVERHEATING of lead acid, or SHUT DOWN of ANY LiFePo4 battery with a BMS. If your BMS disconnects UNDER LOAD, your inverters will EXPLODE!!!! Please re-read this. It is VITALLY important!
For those of you who noticed the 4 larger panels at the far end of the roof, those are german made 4X8 solar THERMAL panels that will heat water inside a 100 gallon storage tank. This gets circulated through a maze of 1/2 inch pex tubing embedded in 1 1/2 inches of Gypsum-concrete on the main floor providing solar radiant floor heating when needed. Each of the 4 rooms on the main floor has it’s own thermostat as well as a branch in the basement where it is converted to hot air.