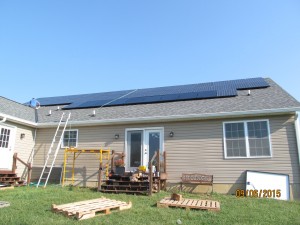
My new OFF-GRID retirement place!

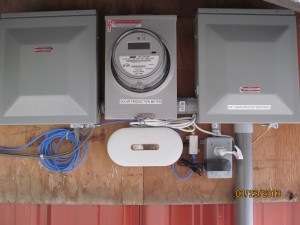
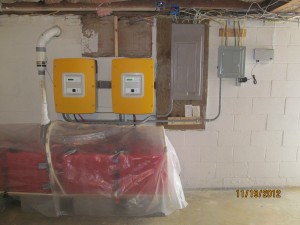
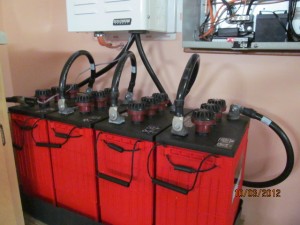
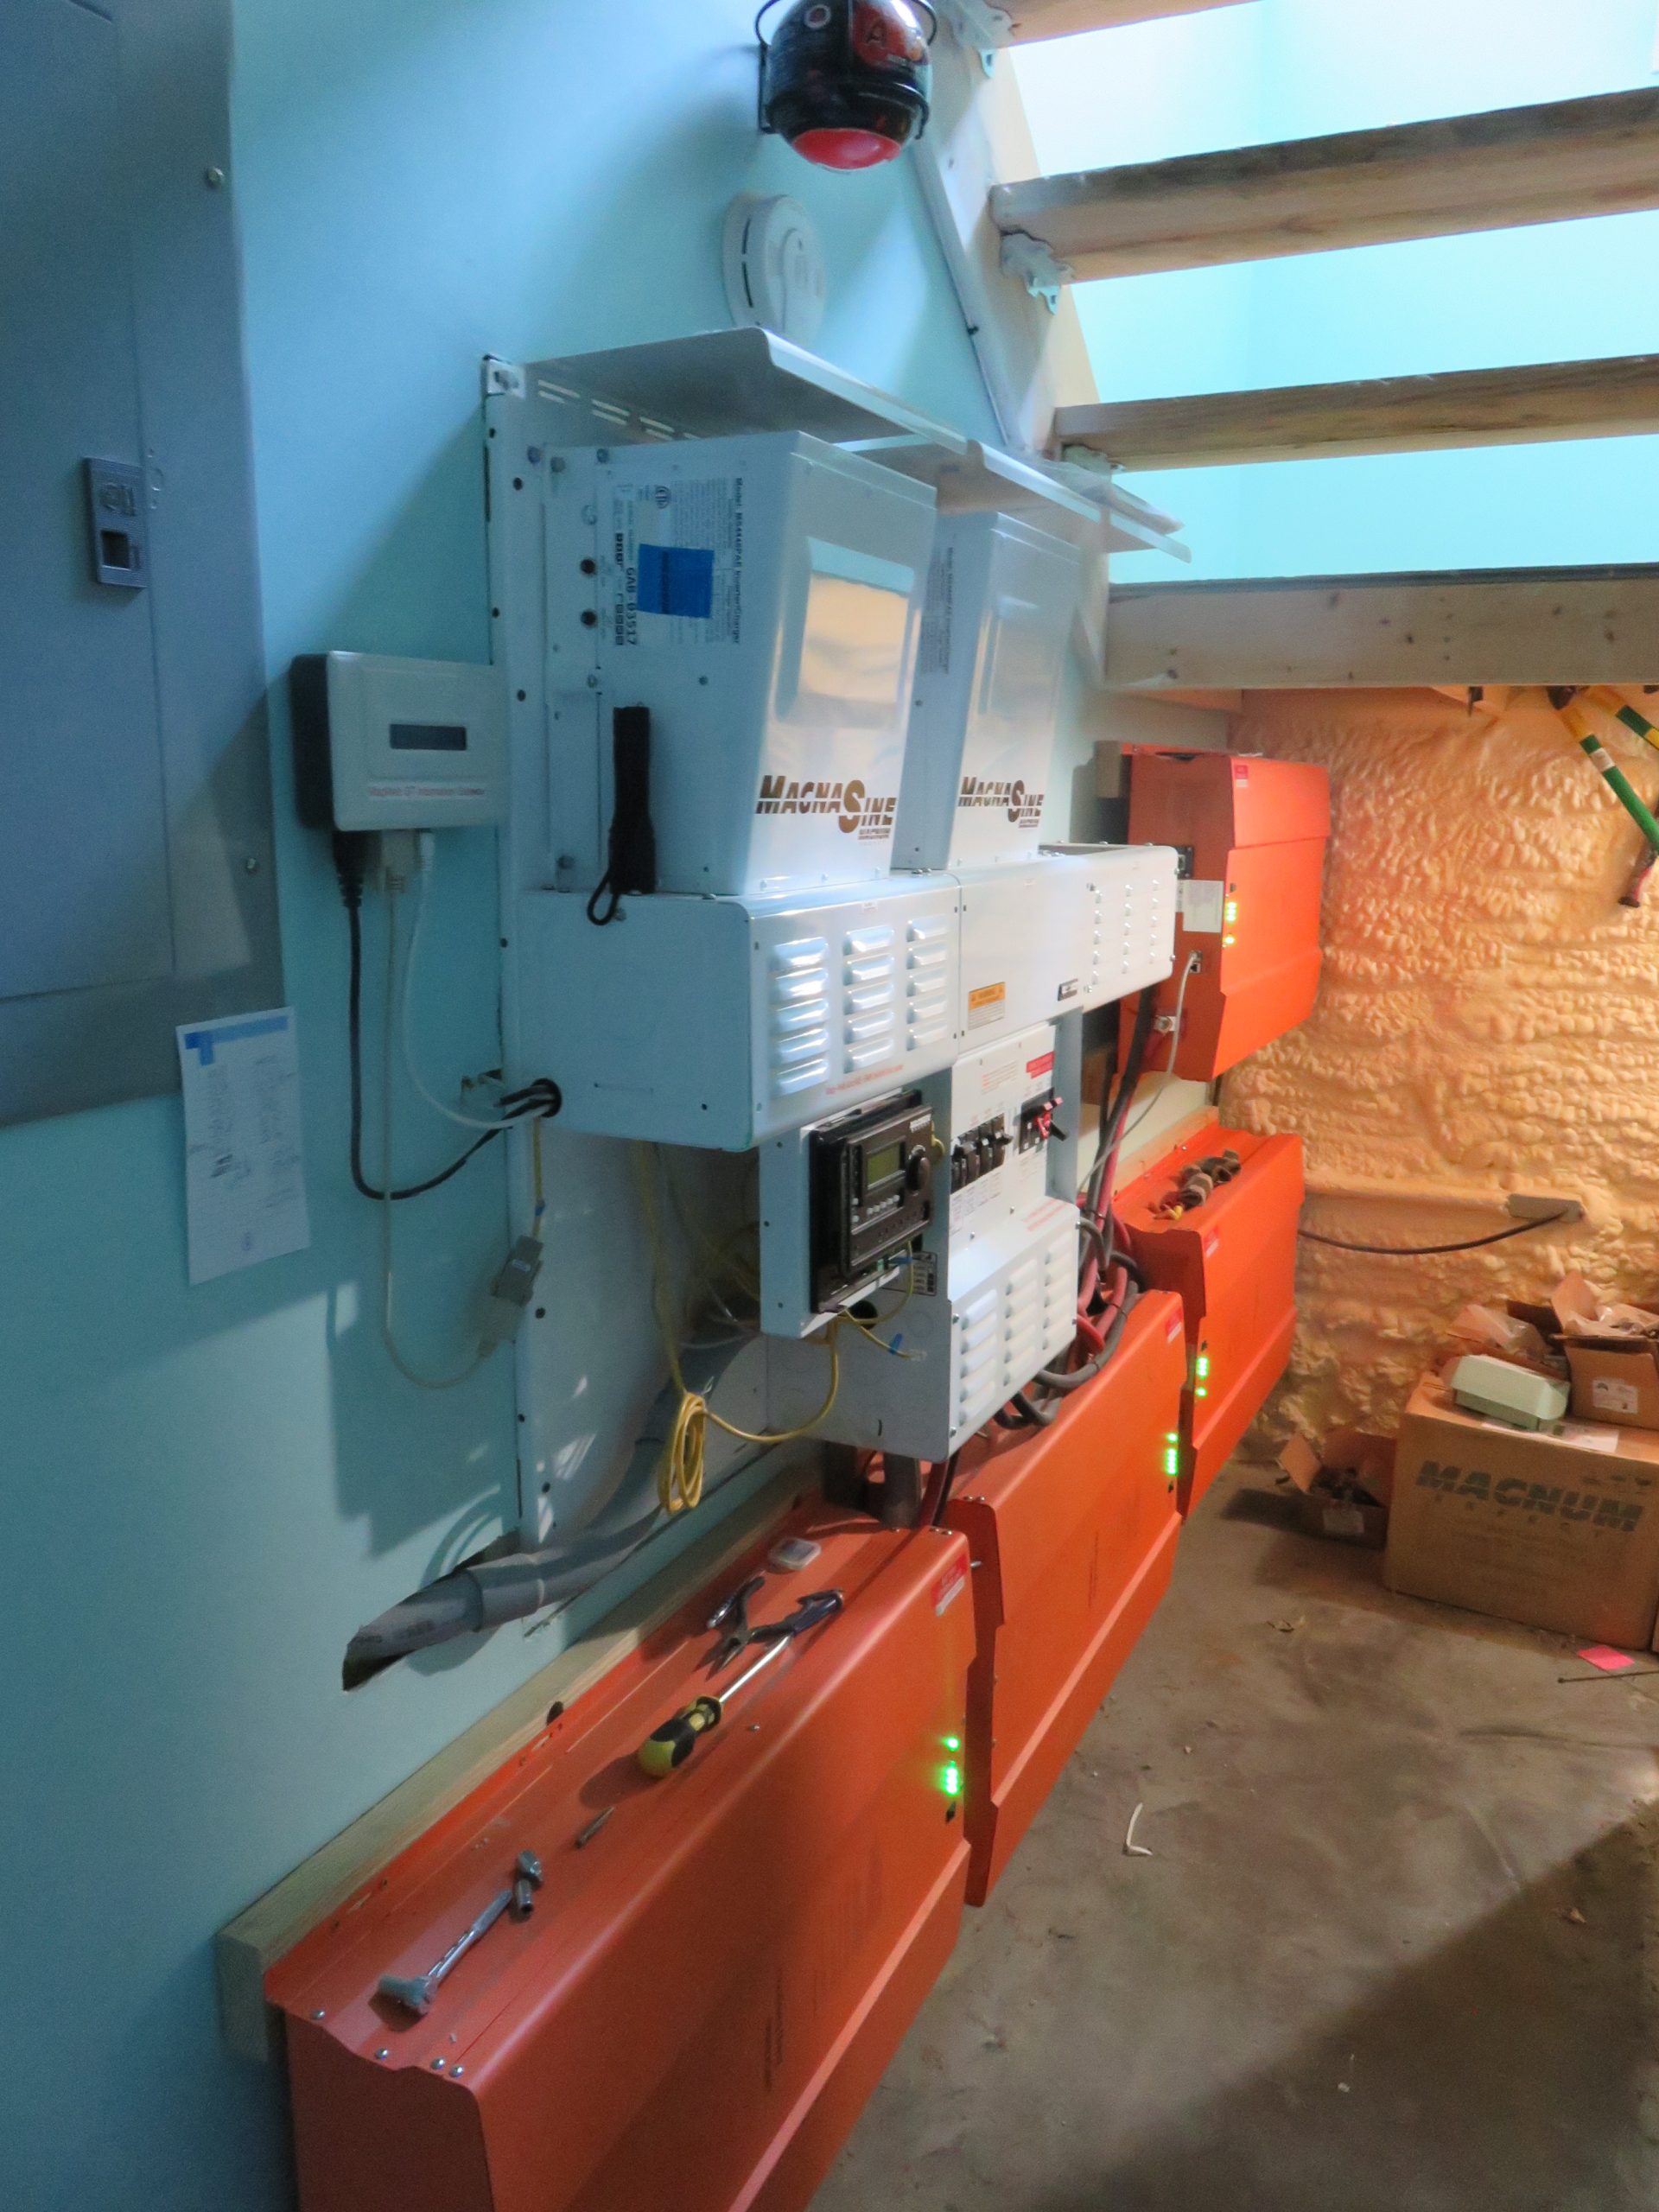
Breaker boxes and battery inverter wall by Keowee Home SolarIt’s been a while since I’ve posted. I’ve still been doing DIY consulting, but all my spare time has been going in to the new house. Yup, it’s OFF-GRID, even though power is available. I’ve always wanted to do this, and this was my last chance to do so. If it flops, I can always connect to the street and have a great backup system!  Grey box is a “future use” primary input breaker box that goes through the wall to a meter, and down into conduit that goes under the driveway to the hillside. Wires are already installed, so if someone in the future wants street power, they can have the power company excavate from the hillside without tearing up the parking pad. From there, conduit feeds into the main switching area on the triple Magnum inverter (which only has 2 MSPAE4448 inverters mounted at the present time for 9KW of power), and then on to the MAIN breaker panel at the far left.

28 solar panels and 4 solar thermal panels by Keowee Home Solar

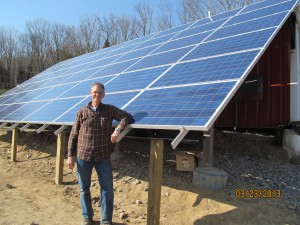
Moving to the roof, I’ve got 28 280 watt panels for 7840 watts in an ideal world. There are 14 Magnum GT500 dual micro-inverters up here that directly convert the DC voltage into 240 volts AC. There are two strings of 14 panels, and each string goes back to a 2 pole 20A breaker in the main panel. This provides both an AC back-feed into the battery inverter to charge the batteries AND at the same time provides any excess power from the sun DIRECTLY to the appliances. So on sunny days, we can do the laundry, running the washer and dryer at the same time without discharging the battery bank at all! This is dramatically different than a traditional off-grid setup with panels, charge controller, batterybank and battery inverter. The traditional setup means the power is limited by the size of the inverter. If my batteries are fully charged, I can draw 8.8KW (2 X 4.4kw) plus the 6KW from the panels for a total of almost 15KW around noon on a sunny day! I’ve trashed my big AGM batteries for the FOUR 10KW LiFePo4 batteries (orange boxes) and all connections to the Magnum interface are equal length 4/0 copper. Thus, a PERFECT matchup in terms of charging power. This also gives a daily (overnight) discharge of about 20%, which babies the battery bank and will allow for a full 6000 cycle (plus more!!) lifespan. The bank is fully charged (in normal sunlight) by 1PM each day. The panels are PERC type, and also do well on grey days, producing about 2800 watts reaching full charge before sundown even in winter. If we have too many dark days, I have a 9KW Generac that is wired to the AC input on the Magnum system. Last year it ran only once for a couple hours. No point in wasting generator fuel – just recharge batteries enough to make it through the night – sun might shine tomorrow!
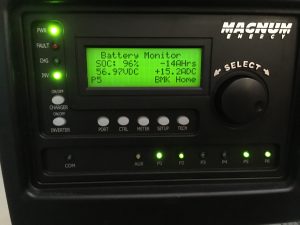
Magnum router photo by Keowee Home SolarThe Magnum ME-RTR Router does a nice job of controlling all three of the MSPAE-4448 battery inverters, and allows fine tuning the BULK, ABSORB and FLOAT voltages to suit whatever battery type you have. This is CRITICAL if you want to maximize the battery life by applying the proper charge regime that the manufacturer recommends. The information display is very informative. I’ve also got a regular display that mounts upstairs where it’s more convenient to keep an eye on the system. It’s also connected to the local network for viewing on my home computer. Shows the same data, but in the form of a pretty graphic!  A Magnum MAGWEB is also connected to put the data onto my local network. IMPORTANT NOTE: if running AC coupled OFF GRID, the ONLY PARAMETER THAT WILL TERMINATE BATTERY CHARGE WHEN FULL IS THE “ABSORB” setting. None of the other ARTR settings matter!! it should be set to about 4 volts LESS than the fully charged battery will be!!! If you fail to follow this, you will overcharge your batteries! This will cause OVERHEATING of lead acid, or SHUT DOWN of ANY LiFePo4 battery with a BMS.  If your BMS disconnects UNDER LOAD, your inverters will EXPLODE!!!! Please re-read this. It is VITALLY important!


For those of you who noticed the 4 larger panels at the far end of the roof, those are german made 4X8 solar THERMAL panels that will heat water inside a 100 gallon storage tank. This gets circulated through a maze of 1/2 inch pex tubing embedded in 1 1/2 inches of Gypsum-concrete on the main floor providing solar radiant floor heating when needed. Each of the 4 rooms on the main floor has it’s own thermostat as well as a branch in the basement where it is converted to hot air.

44 panel job using SunPower panels.

IMG_4932

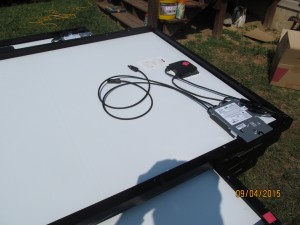
SolarEdge Maximizer mounted to panel and leads dressed correctly.

IMG_4933

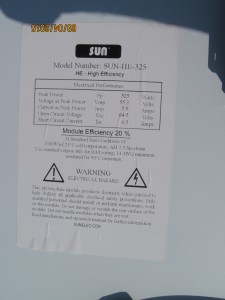
label on SunPower. Impressive specs!

SunPower panels are made by a vertically integrated company in California using proprietary cell technology their founder developed. Their cells are small, but very efficient, with NO shiny silver conductors blocking the face. These cells are found on most Military, aerospace, and high-end jobs! Imagine my surprise when my favorite panel reseller announced they had some for sale. Normally, these panels go for about $1.50/watt, and can only be purchased directly from SunPower. The panels we got were obviously “2nds”, but the reason why was because their leads were shorter than standard! This project used a SolarEdge inverter, that has MAXIMIZERS mounted at each panel, so the slightly shorter lengths had ZERO consequence on this project, and the homeowner got a tremendous system at a DEEP discount. The reseller put his own label on the panels (which promptly fell off at the first dew!), but from the photo you can see the specs, and they are impressive. What’s even more impressive is that the panel SIZE is 41 X 60 inches – SMALLER than standard 60 cell panels on the market!.

IMG_4971

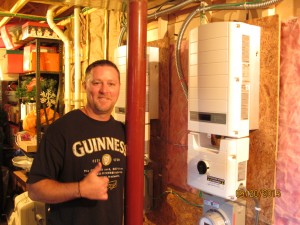
two SolarEdge 7600 inverters mounted to panel in the basement

The job came to a total installed power of 14,300 watts, so I recommended that we use a PAIR of SE 7600 inverters. PUCO rules for Ohio say anything over 6000 watts must have a utility grade meter, but for this job we needed TWO meters. The client had TWO 200A service panels, and in order to be in compliance with the NEC (National Electric Code), we could not backfeed both inverters into one panel due to the current limitation for backfeeding. (1.2 X buss rating minus the main breaker) so it would be (1.2 X200)-200 =40A. So we ran each inverter through a meter, to a disconnect switch mounted on the outside of the house (required by the local Fire Department) and then to each inverter. It was a little extra work, but it passed all inspections with flying colors. Both inverters were mounted side by side in the basement, and the 4 strings were run down 2 rigid metal conduits from the roof all the way to the inverters. When running high voltage DC lines inside a residence they MUST be in RMC. That way, if there is ever a short, it will go to the metal conduit and cause a breaker to pop rather than get hot and start a fire! Here’s a picture of the inverter pairs and the happy homeowner!

IMG_4956

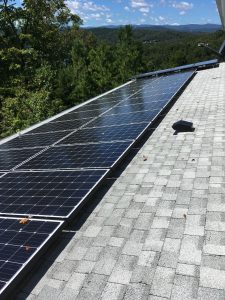
Finished installation of 44 panels on south facing roof.

Standard Everest rails and hardware were used to mount the panels to the roof. 8 of the panels were darker than the others, so we put them centered in the bottom row, between some plumbing vent stacks. There’s not a tree anywhere near the home and the roof faces due south, so it makes a LOT of power!!  The owner provided a crew of 4 and the whole job took just a hair more than 2 days of time. They prehung and wired the inverters in the basement, so all that was required was the panel hardware and mounting, and running the HV solar wire down the RMC to the inverters in the basement! This setup makes about 1,500 KWH per month (average) which in our area adds up to about $150 in power savings!

Filter protects gear from EMP!!

I just received this announcement in an email from one of my many electronics industry sources. It describes a new filter, used by the military to protect sensitive electronic gear from EMP or equivalent events. Just thought I’d pass it on! HEMP Filter link

Solar Tax Credit extended to 2030!

Here are some highlights from a recent article in SOLAR INDUSTRY MAGAZINE.

If several recently introduced legislative bills give any indication, Congress has heard the call from solar energy advocates to modify the investment tax credit (ITC).

The ITC, which was originally set to expire Dec. 31, 2021, currently pays a credit of 26% for qualifying projects. The tax credit has been extended to 2030!! The credit also covers batteries!

In recent months, both the House and Senate have introduced legislation that not only called for an ITC extension but also stipulates that solar projects should qualify for the tax incentive based on when they start, as opposed to when they are placed into service.

On Feb. 6, Sens. Dean Heller, R-Nev., and Michael Bennett, D-Colo., co-sponsored the Renewable Energy Parity Act of 2014, which would allow developers to qualify for the ITC if projects are under construction before the credit’s expiration date, rather than having to wait until those projects are completed and in service.
In August, Rep. Paul Clark, R-Calif., introduced H.R. 3017, the Renewable Energy Construction and Investment Parity Act of 2013, which also extends the energy tax credit to solar energy, fuel cell, microturbine, combined heat and power systems, small wind energy, and thermal energy properties – the construction of which begins before Jan. 1, 2017.

A whole TOWN goes off grid in Germany!!

Found this story today, and it is really amazing how a little bit of willpower and cooperation allowed this small town in Germany to not only go OFF GRID (total disconnect!) but to also SELL power to neighboring towns at a discounted rate! Read the story here: OFF GRID GERMAN TOWN STORY

Our power costs are CHEAP here in the MidWest!

I just read a blog at my friend’s website (www.runonsun.com) and learned that folks in California are paying 22 Cents/Kwh for their electricity. That’s over TWICE what we pay here in the MidWest. This is very likely the reason there’s so much residential solar built up out West. Our energy prices here in Ohio, Indiana, Kentucky and Pennsylvania are all around 10 cents/Kwh, and we are blessed. But don’t think that our prices won’t go up. Coal fired plants are being closed every week because they are old, obsolete, or simply can’t meet the new EPA standards for particulate emissions. Yes, there are new gas turbine power plants being built, and yes, we are using LESS electricity (as a Country) than ever before, but this is not a balanced equation. Our prices have been held low due to coal subsidies from the government, and these will disappear with the coal plants. Solar panel pricing has bottomed out and prices are stabilizing in the 79 to 90 cents/watt range. We might squeeze a few percent out of inverter costs, but for now, we are riding near the all time price lows for residential AND commercial solar PV systems. It might be time to plan on installing that dream system in the early Spring, before demand begins to force component pricing to rise…

Best wishes and sunny days!
Joe

Power Point for Mother Earth News Festival in 7 Springs PA

Just thought I’d post this for the convenience of those folks who might attend my seminars this year, and would like to review them at their leisure from home. Even if you don’t attend the fair, there’s some pretty good info in this presentation for anyone considering doing PV Solar as a DIY project. The rest of my blog is filled with lots of detailed photos and text from solar projects of all sizes and equipment types.

Cinci Home Solar presentation at 2013 Mother Earth News Fair in 7 Springs PA

Finish phase 2 expansion at East Fork Stables

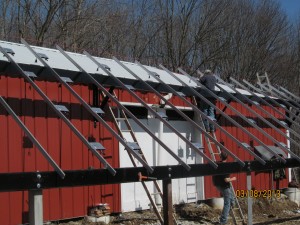
Racking goes up at East Fork Stables

Cinci Home Solar works with EFS to get racking up using 50% on hand materials.

Missed this photo on the first part of this adventure. The owner had materials on hand, and made the posts of Steel L channel, the beams from Steel S-channel, and the barn support brackets from 2 inch steel L material. The owner (George) is a VERY resourceful fellow – some might call him a scrounger, but I call him SMART! I passed along a great vendor deal on the solar panels and he purchased them direct. The BOS (balance of system) materials was purchased through Cinci Home Solar at great pricing, bringing the whole project in at about $3/watt, and this includes the battery bank and backup power inverters in addition to the Enphase micro-inverters behind each panel. The work was spread over 4 full days, with the helper crew varying from 1 to 3 guys and myself. Plenty of manpower to get this rather large project done in a timely fashion. Winter is really variable in Cincinnati, and whenever the weather was predicted to be above 40 and sunny, George called and we got the job done. Fortunately, this job was a quick drive from my home, and it wasn’t a problem. Normally, these 3 or 4 days would have been all condensed into one extended visit! I aim to please, whenever possible…


DIY Solar array expansion by Cinci Home Solar

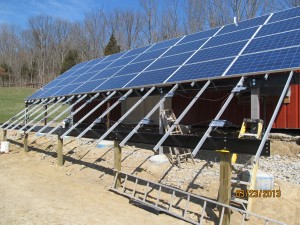
DIY Solar expansion -adding 2 more rows to bottom of 32 panel array.

After we finished the 32 panel array, George saw that some minor grading of the ground near the bottom would allow plenty of room for 2 more rows! A week later he called me and said “Hey Joe, come on out and lets get these 2 rows installed – tomorrow’s weather looks great. So we did!  When I ordered the extra components, we also added 8 more rails – one under each of the 8 columns of the upper 4 rows. You can see them mid-panel in the picture to the right. This provided the extra strength and rigidity that the span required for both wind and snow loading. Splicing the extra rails that extend to the newly installed lower beam also provided a counterbalance to the free span above.
The two missing panels at the lower left were intentionally left off because of a stone access road to the hay barn that George didn’t want to move.


DIY Solar install of Enphase M215 Micro-inverters

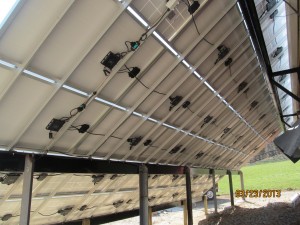
DIY Solar installation of Enphase M215 Micro-inverters.

This is what the backside looks like after everything is in place. After the rails were set, the Enphase M215 Micro-inverters were mounted. Then the #6 bare copper ground wire was run in series to each inverter. We grounded BOTH ends of the #6 copper, just because we could. Next came the Enphase TRUNK Cable, mounted with stainless steel clips to the rails. Then the panels were added, the micros were plugged in to the trunk cable and the panel leads connected to the micros. One end of the trunk cable is sealed with a weather tight cap, and the other goes to a weatherproof junction box (white) to transition to standard exterior rated 12-3 with ground romex. The romex connects to a breaker box with a 20 amp 2 pole breaker for each string of 16 and 1 string of 14 panels. Then, the entire array is nicely dressed using tie wraps so that all the wiring is suspended between the panels and the bottom of the rails to keep it from whipping in the wind or getting snagged by anything.


Power panel mounted below array

Power Panel beneath the array, mounted to the side of the hay barn.

Here’s the power panel. Public Utility Commission in Ohio says any array over 6Kw must be metered by a UTILITY GRADE meter. Got one on Ebay for $35. Breaker box on left contains the 3 solar breakers. That feeds through the meter to the master breaker box on the right. Master breaker box connects to the utility grid via a buried conduit over to the other barn that had power in it already. Below the utility grade meter is the Enphase ENVOY monitoring unit that ties all this to the internet so George can watch things from his home computer. He can share a link with his friends as well. I’ll post this link soon as I get it from George! The Utility voltage here is rather high – close to the limits for most inverters, at 254Vac. This causes a few of the inverters to occasionally shut down (to protect themselves). I’ll be looking into this further on my next visit to see how we might correct this…


Almost finished array by Cinci Home Solar

Almost finished DIY solar array accomplished with a little help from Cinci Home Solar!

Here’s the finished array. Still need to trim the excess rail length at the bottoms. If you look close, you might just spot some mis-alignment within the array. George got 2 pallets of panels. Same part number, same vendor, but one pallet was 1/2 inch shorter on the long side (out of spec…). We didn’t catch this till 5 were mounted in the top row. George, being a prudent and thrifty fellow, called the panel supplier and negotiated a compromise that didn’t require a return of the panels. The size only affects the esthetics slightly, and a cost reduction is pending!  The Enphase ENVOY normally communicates over the power lines, but there’s a half mile of them back to the house and that’s too far for it to work, so I added an Engenius EOC-1650 at the house as an access point, and atop the array as a client/bridge. It works great – with 100% signal integrity, and also provides WIFI to his customers and visitors! The EOC-1650 is that little white gadget at the top right of the array.

Serious grid-tied/grid-backup system!

DIY Solar grid backup system

Ground mounts are an attractive alternative if you don’t have much roof space and want a system that allows you to live comfortably WITHOUT the grid!!

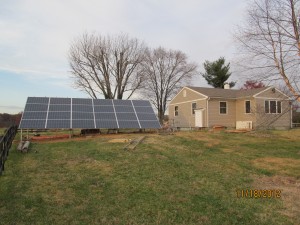
Nestled in the middle of a 26 acre plot is this cozy updated farmhouse with almost 6KW of solar power. The home is well insulated, and fitted with all the high efficiency goodies. Propane fired DEMAND water heater, wood stove for heating, LED lighting and more! At first I assumed he wanted a ground mount to keep it away from the house, but when I arrived on site I knew right away the real reason – no room on the roof! But seriously, this setup goes way beyond just a large array. The owner wanted plenty of AUTONOMY – that’s lots of days of off grid operation without worry of running the battery bank down. And plenty of power, so that if he wants to do laundry while off grid, it won’t be a problem. So we got together and discussed the options and the owner decided to DO IT RIGHT the first time. I explained that batteries would be a large part of the project cost, and he would have to understand and CARE for the battery bank if he expected it to last 10 years or more.  He was more than willing to listen, read, study and understand the care and feeding of his battery bank, and as a result is VERY pleased with his installation.


DIY Solar ground mount everything in place and ready to add panels

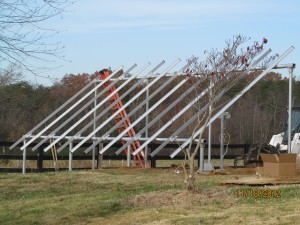
Trench backfilled, horizontal pipe (3 inch galvenized) added front and back, and vertical rails to carry the solar panels installed. Ready for panels and wiring. Owner and a few helpers accomplished this in 2 days of hard work. Not much daylight in December, but DIY folks are not afraid to work sunup to sundown!!

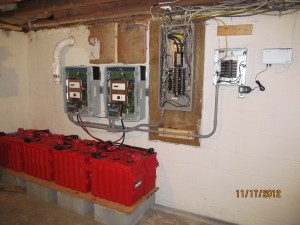
While all this activity was going on outside,  I was busy in the basement, hanging the TWO Sunny Island inverters on the wall, mounting the small EMERGENCY POWER breaker box and running conduit between the inverters, the main breaker box and the new Emergency power box. I’d come up for air once in a while to check on the ground mount work, just to make sure it was square and plumb, but these guys knew what they were doing and got it all right on the very first pass!  Looking at the pics below, we chose to use TWO Sunny Islands for several reasons. 1st and most important was that the Sunny Island is without question the best BATTERY TENDER around. It can use the grid or the array charge the batteries, and it has sophisticated software to monitor the battery health and adjust things as needed to optimize the battery care. It LEARNS over the 1st 8 weeks how the battery supplies power and how it accepts charge and then adjusts itself for the best possible care. We used TWO Sunny Island inverters so that we could SLAVE them together and create 240VAC “split” phase. The Sunny Island is a 120VAC unit and would otherwise need a lossy transformer to boost the output to 240VAC.   We doubled the available continuous output power to 13,000 WATTS by doing this. That is a LOT of backup power, and will allow completely normal living in an off grid situation. The owner wanted lots of autonomy (days of power off grid) so we went with the largest batteries withing the budget – Rolls FLA 6 volt 820AH.  EIGHT of them to reach the 48VDC the Sunny Islands need.  That’s almost 40KWH of backup power. And remember, when off grid, the sun on the array will recharge them, as well as power the house!  I didn’t have time to hang around while a battery BOX was built, so we put up a poly tent and connected the vent fan. This was only a temporary fix and has since been replaced by an appropriate battery box. The exhaust fan is programmed to come on while the batteries are charging – since this is when they give off Hydrogen gasses which are explosive in small amounts.  The owner has since also installed RECOMBINATION CAPS which reduce the outgassing by 99% and reduce fluid losses considerably – making it only necessary to check acid levels in the battery every two months or so, rather than every 2 weeks. A wise investment – since it minimizes outgassing of Hydrogen if the vent fan were to ever fail! Batteries are a VERY serious bit of hardware and you MUST care for them if you expect to get 10+ years of service!  Always wear safety glasses, a rubber apron and rubber gloves when checking/filling the cells!

DIY Solar grid-tied backup system connected and ready for power!

Some of the AC lines have been moved to the emergency breaker box, all covers are on, and temporary poly cover over battery box has been connected to the power vent fan. When the battery bank charges (at 38 amps DC) the batteries bubble up hydrogen gas and without the fan and cover, the room would reach explosive hydrogen levels in less than 1 minute. NEVER power up a battery system without a vent system!! A 4% concentration level of Hydrogen gas is highly explosive.

Battery bank, inverters and emergency breaker panel on DIY Solar installation

Two Sunny Island battery/inverters on the wall, eight 6 volt 820AH batteries below elevated off floor to make watering easier. DC cables connected and AC interconnections in Plastic conduit for safety. Ready to move some wiring from the main box to the emergency breaker box. Only items in the emergency box will be powered when running off grid. System cuts over instantly when grid drops out. Barely a flicker of the lights, it happens so fast! Same thing happens when power is restored. Back on grid in an instant.


When a lead-acid battery is discharged, the electrolyte (sulfuric acid) and the active material on the plates of the battery (lead) are consumed to produce water and lead sulfate and current flow. The chemical equation for a lead-acid battery during discharge is: PbO2 Pb 2H2SO4 –>PbSO4 2H2O Ideally it’s just hydrogen gas, but when doing Equalization charging, you’re going to get some hydrogen sulfide as well – you’ll know it by it’s Sulfur smell and the stinging sensation to your eyes! Make sure the battery box power exhaust fan works BEFORE you turn on your system. In this setup, I programmed the fan to run whenever the batteries are charging. As long as the fan is running, there is negative pressure in the box (or temporary tent in this case) so even any holes or leaks will take fresh air IN to the box/tent and then OUTside the house through the white PVC vent at the left. Happy to say that the 1st charge cycle was free from problems and there wasn’t even the tiniest hint of any gas in the room. The use of RECOMBINATION caps is HIGHLY recommended. They will eliminate almost all of the outgassing and make the battery liquid levels go down MUCH slower.

Backup System finished at Little House

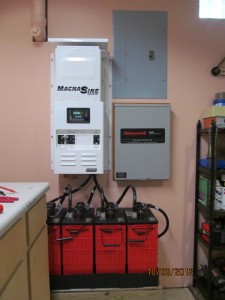
Magna Sine inverter and Rolls batteries. Whole house transfer switch also.

Off-grid installation complete at the Bunker!

Wow, it’s taken a while to get this posted, but I’ve got the grid-backup system completed at our little house (we fondly refer to it as THE BUNKER…). I was recently out there during a freak snow storm that dumped 5 inches of wet snow in about 2 hours, and when the power went out, there was just a slight flicker of the lighting as I was sitting at the computer checking my email. The UPS on the computer didn’t even get a chance to kick in! I excitedly went downstairs to the basement to check out the inverter, and sure enough, it was on line, quietly humming away, providing full power to the main electric breaker box for everything that was presently on in the house. The Magnum MS-PAE 4024 inverter can provide about 4,000 watts of continuous power until the batteries discharge 80% of their capacity. Since the house normally consumes only about 500 watts (average) power, this represents about 20 hours of run time. Fortunately, when the backup system is in operation, the solar PV system can “back feed” through the breaker box and provide the power the house needs as well as re-charge the batteries, so this setup can run pretty much indefinitely, as long as there is a few hours of sun each day. Even on a cloudy day, the 2.4KW (Twelve 220 watt panels) solar array provides about 500 watts, so that extends the capacity of the system pretty well.


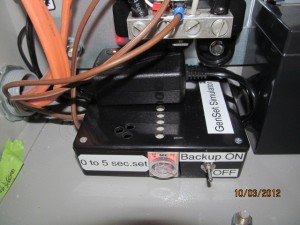
Home Brewed Genset simulator for transfer switch activation

In order to make the TRANSFER SWITCH operate, I had to build my own little GENSET SIMULATOR. It connects to the output of the backup inverter and provides the necessary voltage and control signal to the transfer switch to make it kick over when the power goes out. These TRANFER SWITCHES are designed to normally work with a gas or diesel GENERATOR SET, as they are called.

It took a little studying and research, but I figured out how to SIMULATE the voltage and signals that normally come from a GENERATOR SET that would connect to a WHOLE HOUSE TRANSFER SWTICH on the V+, GROUND, and PIN 23. These are the 3 wires that are standard on any gas or diesel generator. Since I’m using an electronic inverter (Magnum MS-PAE 4024), such signals were not available, so I came up with a little box that has 2 relays in it. One is standard and the other is a 5 second delay unit so the system won’t “chatter” if power drops in/out rapidly. If you’d like the details on how to build one, I’ll be glad to send you a schematic. Just drop me a line at: Joe@cincihomesolar.com

back up system Battery Bank

ROLLS 520 AH 6 volt batteries.


These are the batteries I chose. Since I’m on a tight budget, I chose the best bang-for-the-buck, and it ended up being the Rolls 6 volt 520AH model. I splurged on the funky looking RECOMBINATION CAPS, rather than the normal vented caps that come with the batteries. By installing the RECOMBINATION CAPS, the hydrogen gas generated during charging is sealed inside the battery 99%, and the battery loses MUCH LESS liquid over time than a VENTED battery would. A box and vent fan are still required for safety though, and I will add this to complete the project very soon. Without these special caps, in just 30 seconds of charging at 90 amps, the hydrogen gas coming from the batteries would reach 4% concentration and become highly explosive, so this is nothing to fool around with! VENT YOUR BATTERY BANK TO THE OUTDOORS!